Gridレイアウトは格子状にコントロールを配置するレイアウトを提供する機能になります。
このレイアウトを使うと何がうれしいかと言いますと、コントロール配置をある程度自動で配置してくれる点です。
Gridレイアウトは行列でコントロールを配置する領域を作ります。HTMLのTABLE要素のような振る舞いになります。
学習の進捗状況
なかなかWPFの学習が進みません。
XAMLでデータバインディングするプログラミンスタイルを貫こうとすると外部のライブラリがないと難しいようです。
基礎をきっちり抑えないとライブラリの有難みが出てこないと考えて、基礎を学んでいたのですが結構苦痛です。
このままだと停滞してしまいそうなので、スタイルにはこだわらずに「とりあえず動けば良し」の方向で学習を進めたいと思います。
実行環境
Winodws10 Pro 2004
dotnet –version 5.0.104
プロジェクトの作成
mkdir <プロジェクト名>
cd <プロジェクト名>
dotnet new wpf
code .
ソースコード
ファイル名:MainWindow.xaml
<Window x:Class="WpfSample8Grid.MainWindow"
        xmlns="http://schemas.microsoft.com/winfx/2006/xaml/presentation"
        xmlns:x="http://schemas.microsoft.com/winfx/2006/xaml"
        xmlns:d="http://schemas.microsoft.com/expression/blend/2008"
        xmlns:mc="http://schemas.openxmlformats.org/markup-compatibility/2006"
        xmlns:local="clr-namespace:WpfSample8Grid"
        mc:Ignorable="d"
        Title="MainWindow" Height="600" Width="800">
    <Grid>
        <Grid.ColumnDefinitions>
            <ColumnDefinition Width="*"/>
            <ColumnDefinition Width="*"/>
            <ColumnDefinition Width="*"/>
        </Grid.ColumnDefinitions>
        <Grid.RowDefinitions>
            <RowDefinition Height="*"/>
            <RowDefinition Height="*"/>
            <RowDefinition Height="*"/>
        </Grid.RowDefinitions>

        <Button Content="左上"
                Margin = "5,5,5,5"
                Grid.Column="0"
                Grid.Row="0" />
        <Button Content="中上"
                Margin = "5,5,5,5"
                Grid.Column="1"
                Grid.Row="0" />
        <Button Content="右上"
                Margin = "5,5,5,5"
                Grid.Column="2"
                Grid.Row="0" />

        <Button Content="左中"
                Margin = "5,5,5,5"
                Grid.Column="0"
                Grid.Row="1" />
        <Button Content="中央"
                Margin = "5,5,5,5"
                Grid.Column="1"
                Grid.Row="1" />
        <Button Content="右中"
                Margin = "5,5,5,5"
                Grid.Column="2"
                Grid.Row="1" />

        <Button Content="左下"
                Margin = "5,5,5,5"
                Grid.Column="0"
                Grid.Row="2" />
        <Button Content="中下"
                Margin = "5,5,5,5"
                Grid.Column="1"
                Grid.Row="2" />
        <Button Content="右下"
                Margin = "5,5,5,5"
                Grid.Column="2"
                Grid.Row="2" />
    </Grid>
</Window>
他のファイルは変更なし
実行すると3×3のGirdに9個のボタンが配置されます。
ColumnDefinition WidthとRowDefinition Heightに”*”をセットすることで同じ高さと幅になっています。Autoにセットすると配置されるコントロールのサイズに調整されます。
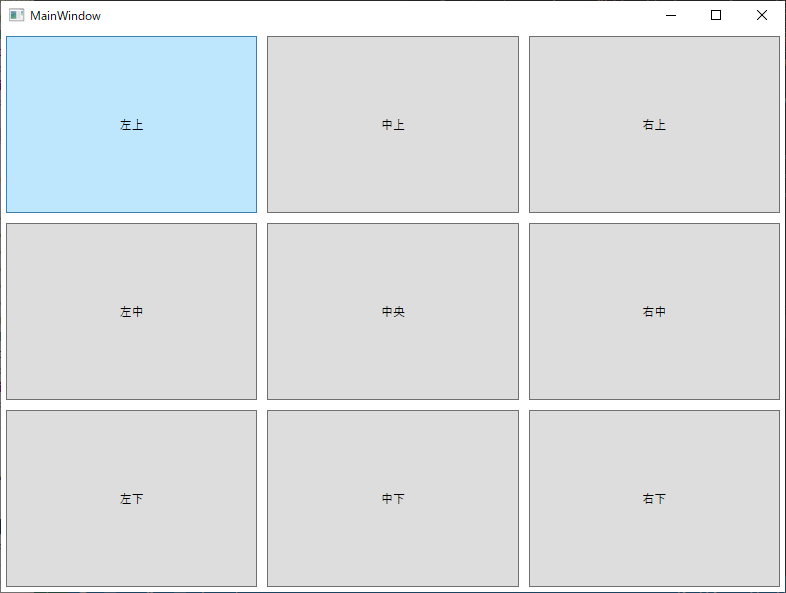
ウィンドウのサイズを変更すると連動してボタンも変更してくれます。
これをC#で実装しようと思うと結構煩雑になりがちなので、ありがたい機能だと思います。

コメント